Image Map

Saturday, December 31, 2011

Top 5 of 2011 and a Happy New Year!

Another year has come and gone.  Can you believe it?  You think the year starts off slow, (at least it does when you have to battle cold winters) and then snap summer is over and you are already getting ready for Thanksgiving and Christmas. 2011 was an interesting year for me, full of wins, challenges and fun. I started to find my blogging groove and got addicted to so many other blogs and "pinning".   I have a lot of hope for 2012 for all facets of my life.  My goal is to be more patient, open and happy.  Don't sweat the small stuff and be thankful for what I have.  My blogging goal is to get a bit healthier.  I know my focus is baking but their are healthy baking alternatives and I plan to explore them, without forgetting my true sweet tooth.

I wish for all my readers a fantastic 2012, filled with happiness, adventure and excitement.

Happy New Year!

Here are the 5 most popular posts of 2011.

1) Chocolate Coconut Pie   - Such an easy pie to put together and so delicious! I am already thinking of variations.


 2) Craggy Chocolate Cake - Flourless and four ingredients.   Pretty, fudgy and rich chocolate heaven.


3) Banana Cupcakes with a Peanut Butter Lindt Filling and PB Chocolate Buttercream - This is one of my favorites of all time!  The secret peanut butter surprise inside was awesome.  I still crave these.


4) Apple Crumble Loaf - I baked my fair share of apple desserts this year, this loaf had layers of apple and crumble in between layers of loaf.


5) Oatmeal Turtle Jumbles - Part of my 12 days of Cookies these spiked up to the top 5 very quickly.


Although I love the above top 5, there were a few others that I particularly loved. 


Friday, December 30, 2011

12 Days of Cookies - Day 12 - Cookie Pie and A Giveaway


On the twelfth day of cookies my true love gave to me - a cookie in a pie. I finally made it!  Geez..could that taken me long enough.   There never seems to be enough time in the day for me to get things done.   Either that or I am in super slow vacation mode and my productivity bar is on low.    When on vacation my priorities sort of get jumbled around and there are all these little things I don't really get to do, like shopping in the middle of the day,  lunch with a girl friend or just curling up the couch doing nothing and watching day time tv or reading a book, you can't always do these small things when you are working 9-5.  In short this vacation has been so nice and relaxing.   Time to start thinking about a new year and new things.

Enjoy Day 12 - Finally!     (P.S - GIVEAWAY DOWN BELOW!)

Cookie Pie

(Adapted from BAKED - New Frontiers)

INGREDIENTS:


  • 1 Pie Dough in shell - homemade or store bought - uncooked, frozen
  • 1/2 cup unbleached all purpose flour
  • 1/4 cup granulated sugar
  • 1/2 cup packed brown sugar
  • 2 large eggs
  • 3/4 cup (6 oz) unsalted butter, softened, cubed
  • 1 tbsp whiskey
  • 2/3 cup toasted, chopped walnuts
  • 3/4 cup semi-sweet chocolate chips
  • 1/3 cup butterscotch chips
  • 1/4 cup toffee bits


INSTRUCTIONS:

1)  Preheat oven to 350F.  Remove pie shell from freezer while preparing filling.
2) Combine flour and sugars in a medium bowl and whisk together.


 3) In your mixer bowl/large bowl whisk together the eggs until foamy, a few minutes.  Switch to the paddle attachment or beaters.  Gradually add the flour/sugar mixture to the eggs with the mixer on low. 
Once all flour/sugar has been added, beat on high for 2 minutes.


4) Add the butter, scrape down the bowl and beat to combine butter.  Add whiskey and mix to combine
5) Fold in toasted walnuts. both chips and toffee bits, reserve about 1/3 cup chips (combination of both chips)


6) Place pie shell  on a baking sheet and pour filling into shell.   Top with remaining chips.


7) Bake in center rack for 45-50 minutes.   Check after 30 minutes and cover the crust edges with aluminum foil to prevent the crust from browning to quickly.   ( My crust didn't brown to quickly but the originally recipe makes a not to check this. ) Pie is down when a knife comes out clean.   Let cool completely before slicing.  Store pie in the refrigerator, tightly covered for up to 2 days. 

Why not end on a high note I say.  A cookie turned into the main dessert by secretly putting it into a pie shell.  Is it a pie, is it a cookie?  It's both!  Served warm, it is heaven.

MEG's RATING: D-EEEEE-LICIOUS!


The rest of the 12 Days of Cookies
1.   Lighter Stuffed Peanut Butter Cookies
2.   Guinness Chocolate Cookies
3.   Chocolate Mint Sandwich Cookies
4.   M&M Rice Krispie Cookies
5.   Florentines
6.   Red Velvet Blossoms
7.   Oatmeal Turtle Jumbles
8.   Rugelach Bars
9.   Chocolate Cherry Macaroons
10.  Maple Walnut Shortbread
11.  Chocolate Ferrero Rocher Cookies

I can't end my 12 days of Cookies with out a GIVEAWAY!   I did a little bit of searching and found these cute mini pans.   I also love pans that have the lift out the bottom and I will not lie I have bought a few for myself.   They are great for cupcakes, cheesecakes, brownies and for 2012 - portion controlling.

The winner will get 6 Baking Pans

  • 2 - Square pans
 
  • 2 - Mini round pans


  • 2 - mini bundt/doughnut pans


How to enter : comment below telling me your favorite cookie from the 12 Days of Cookies.

For an additional entry join one of the following (you don't have to do all of them)
1) Become a blogger follower 
2) Follow me on Twitter - @Sweettwist_Meg and Tweet - " I want to bake something mini, so I entered the giveaway from @Sweettist_Meg"
3) Join my facebook group - Sweet Twist of Fate and Blogging
4) Send one of these pictures to pinterest.

Come back and let me know you did one of them. 

Entries will be accepted until noon on Monday Jan.2   Winner will be drawn using Random.org

Good Luck and thanks for following the 12 Days of Cookies.


Monday, December 26, 2011

12 Days of Cookies - Day 11 - Chocolate Ferrero Rocher Cookies


I finally have a moment of freedom. Since the day before Christmas Eve I have been non-stop baking, wrapping, cleaning and visiting family and friends. Christmas eve we went to our good friends, Monika and Sebastian's for dinner.  They invited us two years ago to their family dinner and we had the best time.   Unfortunately working around large families we didn't get a chance to make it this last year so we made sure we could fit it in 2011.  This year was no exception to the first. It was another great year, lots of food, wine and great company.

My day 11 recipe is just for Sebastian.  When I saw this recipe, the check mark in my head went off.  He love Ferrero Rochers.  In fact I don't think we go to their house for any event with out bringing him some and there were wine glasses filled with them on the Christmas table.  This time I will be bringing some Ferrero Rochers but they will be frozzen, crushed, chopped and hidden in some chocolate cookies.   It's perfect.

Ferrero Rocher Chocolate Cookies


(Adapted from the Happy Baker)

INGREDIENTS:
1 cup butter, softened
2/3 cup granulated sugar
1/3 cup brown sugar, packed
2 eggs
1 tsp. vanilla
2 tbsp. cocoa
2 1/4 cups unbleached all purpose flour
1 tsp. baking soda
1 tsp. salt
1/4 cup milk chocolate chips
12 Ferrero Rocher chocolates. Freeze chocolates, unwrap and place into a Ziploc bag and smash/chop into small or medium sized pieces.

INSTRUCTIONS:
1) Preheat the oven to 350F.  Line two baking sheets with parchment/silpat.
2) In a medium bowl combine flour, cocoa, baking soda and salt and whisk together.


 3) In a large bowl/mixer bowl beat together the butter and sugars until creamy. 
4) Add eggs and vanilla until well combined.


5) Add the dry ingredients to the butter mixture in two parts, beat on low until just combined. 
6) Stir in the chips and Ferrero Rocher’s.


7) Using a small-medium scoop, place rounds of dough on the prepared cookie sheets.  If the dough is too sticky, cool it in the fridge for 15 minutes. 
8) Bake for 10-12 minutes.  Let cool on sheet for 5 minutes, then transfer to a wire rack.

My first thought is that it needed more Ferrero Rochers, if the goal of the cookie is to have that hazelnut flavour.  On second thought this cookie is awesome, it would be a wonderful chocolate cookie base for so many other cookies.  It is not an intense fudgy cookie but can definitely give chocolate chip cookies a run for their money.  I will use this base for other cookies, for sure! Or just add more Ferrero Rochers next time.

MEG's RATING: D-EEEE-LICIOUS


Don't forget to enter  - Day 12 - Cookie Pie and a Giveaway!!!!


Friday, December 23, 2011

12 Days of Cookies - Day 10 - Maple Walnut Shortbread


 I love the work week leading up to Christmas.  The office is half empty, everyone takes long lunches, restaurants are packed and everyone is struggling to be productive.   Monday starts off a little strong but by Thursday everyone's minds are already gone, talking about family plans, presents and time off. Of course, I was still being productive, wink wink.  Friday ended up being a half day, so I went home early and baked.

I am on Day 10 and cutting it close to get these cookies done before Christmas but the end is near. All these cookies are also making me behind on 3 desserts I have made for random parties.  I know what I will be doing my holidays.  Also, don't forget there will be a giveaway on Day 12!!

Enjoy Day 10!


Maple Walnut Shortbread
(Adapted from Cusine at Home Holiday Cookies)


INGREDIENTS:
  • 1 1/4 cups cake flour
  • 1/4 cup cornstarch
  • 1/4 teaspoon table salt
  • 1 stick (8 tablespoons) unsalted butter, softened
  • 2 tablespoon brown sugar
  • 1/3 cup pure maple syrup
  • 1/2 teaspoon pure vanilla extract
  • 1/3 cup walnuts, toasted, chopped


INSTRUCTIONS:
1) Preheat oven to 350F.   Spray a 8 inch square pan with non stick spray
2) In a medium bowl, add the flour, cornstarch and salt and whisk together. 
3) In a large bowl/mixer bowl, beat together the butter and brown sugar, until light and fluffy.  Scrape down the sides
4) In the mixer running, slowly pour in the maple syrup and beat until incorporated. 
5) Add flour mixture into the butter/sugar mixture 1/3 at a time.  Beat on low until just combined. 
6) Fold in toasted walnuts with a spatula. 
7) Press dough into the square pan, evening out with a spatula or your hands (lightly wetting if needed to prevent sticking)
8) Bake 30-35 minutes until edges become golden.  Let cool a few minutes then cut into bars while still warm.  Let cool completely in pan.


I don't make shortbread very often and now I know why.  I would eat it all really quickly! Buttery, smooth and just melts in your mouth.   I like this one too with out a lot sugar, just pure natural maple syrup.   Has anyone ever tried gluten free shortbread?  I wonder....

MEG's RATING: D-EEEEE-LICIOUS


Day 9 - Chocolate Cherry Macaroons


Wednesday, December 21, 2011

12 Days of Cookies - Day 9 - Chocolate Cherry Macaroons

chcoclate, coconut, cherries, cookies, macaroons

Who else is insanely busy right now?  Everyone raise their hand.  Whether you are finishing up shopping, wrapping, baking, working, we all will enjoy the holiday rest.   Is it a rest?  Bouncing from house to house visiting family and friends.  Well, maybe not but it is enjoyable and fun and hopefully filling - food filling that is.
I can't wait for the wind down,  10 days with no work.  Aaah, my mind is already there.  A few more days to go...  Well if you need an easy recipe because you are too busy like me, try this one.  It does require refrigeration for a several hours but very quick to put together.

Enjoy Day 9

(Adapted from Fine Cooking)
INGREDIENTS:
  • 1 1/2 cups (plus extra for topping) sweetened shredded coconut
  • 150 ml cream of coconut  (See Note Below)
  • 1/2 cup cocoa powder
  • 2 large egg whites
  • 1 tsp pure vanilla extract
  • 1/4 tsp salt
  • 2/3 cup dried cherries, chopped


INSTRUCTIONS:
1) Preheat oven to 325F.  Toast 1 1/2 cups of the coconut on a baking sheet.  Stir, every few minutes.  Bake until some shreds begin to turn brown 10-12 minutes.   Your goal is to dry out the coconut not toast it.   Let cool.  
2) In a medium bowl combine the cream of coconut, cocoa, egg whites, vanilla and salt. Whisk together until well combined. 


3) Stir in the cherries and coconut.   Cover and refrigerate until chilled and firm, minimum 2 hours and up to 24 hours.


4) When ready to bake preheat oven to 325F.  Line a baking sheet with parchment/silpat. Using a mini scoop, about a tablespoon size, drop balls on a the baking sheet.   
5) Top each macaroon with some of the untoasted coconut.   Bake about 25-30 minutes, until the outsides are not quite sticky and the inside is soft.  Coconut on top will begin to brown.  Let cool on the baking sheet for a few minutes before transferring to a wire rack to cool completely. 


NOTE: I could not find cream of coconut in a can but I found creamed coconut in a plastic bag in a box that you reconstitute with water.    I am sure this recipe is better if you can actually find creamed coconut but this worked quite well for me. 

Do I really even need to tell you how I feel about these?  So many wonderful things in a cute little package. 

MEG's RATING: D-EEEE-LICIOUS!


Day - 8 - Rugelach Bars


Monday, December 19, 2011

12 Days of Cookies - Day 8 - Rugelach Bars


Okay, so I organize a lot of baking days with people.   For the last several years my friend Heather and I also got together for a Holiday baking day.   We pick 3-4 recipe and see what we can accomplish,  almost always never completing what we want to. Fun and ambitious  nonetheless.  This year we picked some awesome recipes - one of them being this one.  We have had rugelach on your recipe list every year and we always somehow push it off.   Not this year. I have been a little obsessed with one of my latest holiday magazines from Cuisine at Home.  If you haven't noticed  I think half of my 12 days of cookie recipes are adapted or taken from this magazine. It just has so many fun, cool recipes in it this year.  Lots of creative work going on at Cuisine at Home.  In the magazine this year there are these rugelach bars.  Same great cream cheese based dough but instead of rolling it into individual rolls, you turn it into a bar with dough on the top and bottom and the filling inside. A lot more time efficient, something Heather and I always need on baking day. 

Enjoy Day 8!

(Adapted from Cuisine Holiday Cookies)
INGREDIENTS:
Dough
  • 2 cups unbleached all purpose flour
  • 1/2 tsp salt
  • 1 cup (1/2 lb) unsalted butter, softened
  • 1 - 8 oz - package cream cheese, softened
  • 1 tsp pure vanilla extract
Filling
  • 1 cup strawberry jam
  • 3/4 cup chopped dried apricots
  • 2/3 cup sliced almonds
  • 3/4 tsp cinnamon
Egg wash
  • 1 egg
  • 1 tbsp water
  • granulated sugar
INSTRUCTIONS:
1) In a medium bowl whisk together flour and salt. 
2) In a large bowl or mixer bowl, beat together butter, cream cheese and vanilla on medium speed until combined and creamy
3) Mix in flour/salt until just combined.  Divide the dough into two equal parts, wrap in plastic wrap and flatten into rectangles.  Chill in the refrigerator for at least 5 hours or over night.
4) Remove the dough the from the fridge and make the filling.  In a food processor combine jam, apricots, almonds and cinnamon.   Mix until all minced together and combined.


5) Roll out each portion of dough into 9x13 rectangles, place in between waxed paper or place on small baking sheets and cover with saran.  Freeze for 15 minutes. 
6) Preheat oven to 375F.  Spary a 9x13 pan with non stick spray.  Place one layer of dough on the bottom of the pan, trim off any excess. 
7) Spread the filling over the bottom layer.  Remove the other rectangle dough form the saran or waxed paper. Press on top of the filling and trim off any excess.


8) Combine the water and egg in a small bowl and whisk together.  Brush on top of the dough and sprinkle with sugar.   Bake until golden - 40-45 minutes. 
9) Remove from oven, let cool and cut into any desired shape. 

The dough is buttery, flaky and a little tangy and the filling was not too sweet with a little bit of crunch.  It was also a super easy dough to put together.  The great thing about rugelach is you can change the filling in so many ways depending on what fruit, jam or nut you like.  Dried cherries or figs I have decided will be my next rugelach experiment.  I think next time I will also add an additional half or double of the filling.

MEG's RATING : D-EEEE-LICIOUS

Sunday, December 18, 2011

12 Days of Cookies - Day 7 - Oatmeal Turtle Jumbles


Thursday was mother - daughter baking day.   A tradition we have kept up for several years now.  My mom, sister, my niece and I get together one day around Christmas to bake butter tarts and one or two other cookies or bars.   We almost missed this years baking day but managed to squeeze it in just in time.   I woke up early to pick up the last of our ingredients and they arrived around 10:30.     Our bar of choice this time around was these Oatmeal Turtle Jumbles.    I have had my eye on these for a couple years now in a one of my older Holiday cookie magazines.   I showed my sister the picture and she was hooked - chocolate, oatmeal and caramel.

(Adapted from Cuisine at Home - Holiday Cookies)
INGREDIENTS:
  • 3/4 cup (6 oz) unsalted butter, softened.
  • 1/2 cup granulated sugar
  • 3/4 cup packed brown sugar
  • 1 egg
  • 1 3/4 cups unbleached all purpose flour
  • 1/2 tsp baking soda
  • 1/2 tsp salt
  • 1 1/2 cups quick cooking oats
  • 3/4 cup semi sweet or dark chocolate chips
  • 2/3 cup condensed milk
  • 2 tbsp heavy cream
  • 2 tbsp cocoa powder
  • 1/2 cup pecans
  • 1 tsp vanilla extract
  • 24 caramel squares, cut in half
INSTRUCTIONS:
1) Cover a 10 inch sq. pan with tin foil with enough to fold over 2 opposing edges. Spray with non stick spray. 
2) In a mixer bowl or large bowl , combine butter and sugars and cream together until light and fluffy.   
3) Add the egg and mix to incorporate.   Add in the flour, baking soda and salt, mixing on low just to blend together.


4) Using a pastry cutter blend in oats.  Take 2 cups of the mixture and press down to cover the base of the pan. Set aside


5) Preheat oven to 350F. Add the cut up caramels to the remaining dough, mixing them in with your hands. 
6) In a medium sauce pan on medium heat,  melt the chocolate chips, condensed milk, heavy cream and cocoa powder together.  Stirring constantly until mixture is smooth.   
7) Remove from heat and add pecans and vanilla. 
8) Pour the filling over the dough and spread evenly using a offset spatula. 
9) Crumble the remaining dough & caramel randomly over the chocolate.   Bake for 25-30 minutes until chocolate is set and topping is slightly brown.  Cool bars completely before cutting.  
Bars can be frozen for up to 1 month, it is advised not to double the recipe.  

These bars are a wonderful combination of crunchy, chewy, chocolaty and nutty.  Crunchy oat base, smooth creamy chocolate filling and a gooey caramel crunchy topping.  Need I say more.  My mom and I both brought some of ours to work and they were requests for more.   Good sign I would say. 

MEG's RATING: D-EEEE-LICIOUS!

Wednesday, December 14, 2011

12 Days of Cookies - Day 6 - Red Velvet Blossoms


My Christmas party is over.   My weeks of prep and figuring out my main, sides and desserts are over.   And would you believe I didn't photograph any of it. What kind of food blogger am I?   :-P
I had shredded beef, balsamic fig chicken, baked ziti, roasted vegetables, potatoes/sweet potatoes, mini quiches and quinoa salad.  Not to mention tons of appetizers, 3 desserts and some Christmas tree and Santa hat cake pops.  It was a delicious feast and all I have is some prep dessert photos and a nice shot of one dessert. Things just went by so fast, people were hungry and it was gone. I have no food photos but it was a great night.  There were lots of great costumes and fun and our last guests left the house around 4:30AM.

There is no rest for the wicked though, after I cleaned up on Sunday I was back to baking. We have all seem peanut butter blossoms,  a peanut butter cookie with a Hershey's kiss sitting on top.  But what about a Red Velvet Blossom.  Sweet and tangy like the cupcake but in cookie form.   Absolutely.   I am one of those random white chocolate fans so I always like when I can use those kisses instead of straight chocolate.

Enjoy Day 6!

(Adapted from Cuisine Holiday Cookies)
INGREDIENTS:

  • 1 1/4 cups flour
  • 1/4 cup cocoa powder
  • 1/2 tsp baking soda
  • 1/4 tsp salt
  • 1/2 cup vegetable oil
  • 1/2 packed brown sugar
  • 1/4 cup granulated sugar
  • 1 tsp pure vanilla extract
  • 1 egg
  • 1 tsp white vinegar
  • Red food colouring
  • Approx 24-30 Hershey's kiss - any kind you like (unwrapped & frozen)

INSTRUCTIONS:
1) Preheat oven to 350F.   Line a 2 baking sheets with silpat/parchment. 
2) Combine flour, cocoa, baking soda and salt in a medium bowl and whisk together.


3) In a large bowl or mixer bowl , add oil and sugars and beat until well combined.  Add egg and vanilla and mix to combine. 


4) Add food colouring and vinegar and mix in until incorporated. 
5) Add dry ingredients to the wet mixture, mix on low until flour just combined. 
6) Using a small scoop, add rounds of dough on to prepared baking sheets. 
7) Bake 10-12 minutes until cookies are slightly puffed and still soft. 
8) While cookies are baking ensure the kisses are in the freezer to prevent them from melting quickly. 


9) Remove the cookies the oven and insert one kiss into the center of each.   Let cookies sit on baking sheet a few minutes and then transfer to a wire rack to cool completely. Be careful not to hit the kiss as it will become soft. 

I actually made these twice.  The first time they were too dry and crumbly. I made some tweaks on the second round and they turned out wonderfully!  Just might need to add some more food colouring next time. 

MEG's RATING: D-EEEEE-LICIOUS

red velvet, cookies, hersheys kiss, chocolate


Day 5 - Florentines


Monday, December 12, 2011

12 Days of Cookies - Day 5 - Florentines & The Great Food Blogger Cookie Swap


Today's cookies are not just day 5 cookies, they are my cookie swap cookies.  When I saw the Great Food Blogger Cookie swap through Love and Olive Oil.   I signed right up.  How cool was this idea,  a cookie swap across two countries.  It is crazy.   It is a great to meet new bloggers and find new amazing blogs.   The best part 3 dozen different cookies showed up at my door.   I got so excited every time a box arrived I ripped it open immediately 

These are the cookies I  received : 
1) Haystack Butterscotch Cornflake Cookies from K&K Test Kitchen
2) Nutella Coconut Haystack Cookies from Cravings of a Lunatic
3) Pistachio Cranberry Biscotti from The Bold Baker

They were all absolutely delicious!!


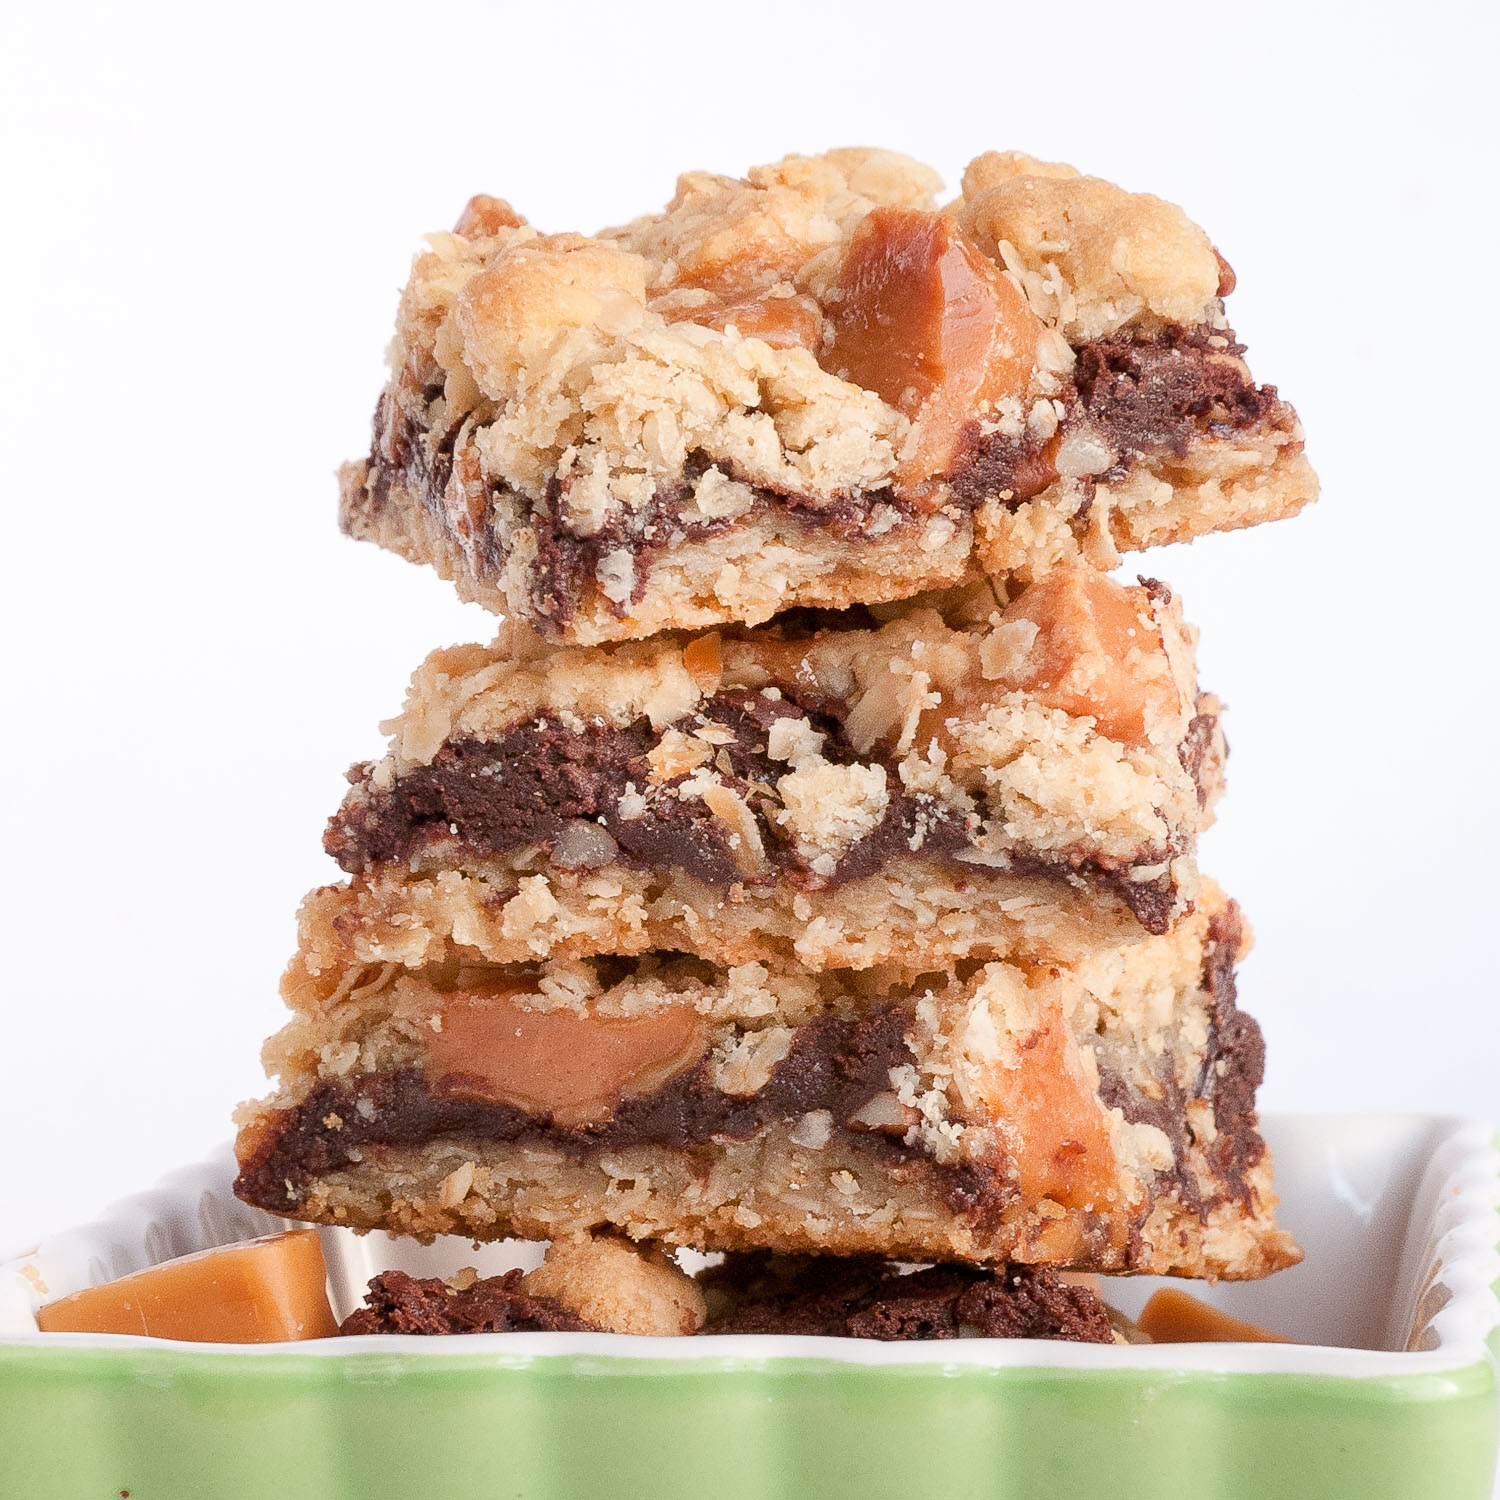
The tricky thing with sending cookies across the country is you have to make sure they will hold up and not fall apart.  I also wanted to choose something that wouldn't go stale, knowing the mail could take longer than I wanted. I have never made florentines before but always have wanted to try them.   They have so many amazing attributes - fruit, nuts and caramel.   

(Adapted from Cuisine Holiday Cookies)
INGREDIENTS:
Crust
  • 3/4 cup (6 oz0 unsalted butter
  • 3 egg yolks, room temperature
  • 1/2 cup brown sugar
  • 1 cup gluten free all purpose
  • 1/4 tsp salt
  • 1 tsp orange zest
Filling
  • 3 oz unsalted butter
  • 1 cup granulated sugar
  • 1/3 cup heavy cream
  • 1/4 cup honey
  • 1 cup sliced almonds
  • 1/2 cup dried cranberries 
  • 1/2 cup dried apricots or dried cherries
  • 1 tsp orange zest
  • 1/2 cup bittersweet or semi sweet chocolate

INSTRUCTIONS:
1) Preheat oven to 350F.  Line a 10 inch square pan with parchment and spray with non stick spray. 
2) In a large bowl or mixer bowl beat together butter and egg yolks until combined, a few minutes.   Add brown sugar and 1 tsp zest until light and creamy.   


3) Add flour and salt and blend until just combined.  Spread the dough in to the pan with an offset spatula.   Bake crust until golden, about 15 minutes.   Remove from oven and let cool on a wire rack.


4) Make the filling: Heat butter, sugar, cream and honey over medium heat. Continue to cook until a candy thermometer reaches 240F, about 5 minutes. 


5)  Remove from heat and stir in almonds, zest and dried fruit.  Pour over cooled crust. Bake 15 minutes @ 350F.


6)  Allow bars to cool on a wire rack.  Ensure bars are completely cool before cutting.  Sliced in your desired size and shape.


7)  Heat the chocolate over a double boiler until completely melted and smooth.    Drizzle over bars through a piping bag or loosely with a fork.


I hope all my recipients liked the Florentines.   I sure did.  Chewy, crunchy and sweet, these cookies are the entire package.  I made two batches of these.  One with dried cherries and dried cranberries and one with dried apricots and dried cranberries.   I mailed a mix of both to each person.   If you are not a huge fan of orange zest, leave it out.  This can be a strong taste.

A huge THANK YOU  to Julie and Lindsay  for organizing the cookie swap and to the three ladies who sent me awesome cookies.  I can't wait to see all of the cookies people made and  I look forward to next years,

MEG's RATING: D-EEEEE-LICIOUS

almonds, florentines, dried cranberries, apricots, cherries


Day 4 - M&M Rice Krispie Cookies
Related Posts Plugin for WordPress, Blogger...