Image Map
Showing posts with label Cake pops. Show all posts

Wednesday, August 17, 2011

Hot dogs and Hamburgers for Dessert??

When you work at a company that makes hot dogs, sausage, burgers, sliced meats and bacon, bringing in desserts for work needs to get fun and creative.   A few years ago I worked at a restaurant company,  one day pre-blog I made cupcake hamburgers and cookie fries.   Everyone just loved them.  So for the last couple months I have wanted to create a dessert that would match some of the items that are made by my current company. Obviously putting bacon into a dessert would be an easy option and becoming quite the popular one. That however wasn't the route I wanted to take.  I wanted something a little more interesting,  I wanted to show them my interpretation of a hot dog. Since it happens to be the summer and hot dog season, there is no better time like the present. 

INGREDIENTS:
  • Box of Yellow/White cake mix and box ingredients 
  • Box of any cake mix you like and box ingredients
  • 3 cups of vanilla icing (1 1/2  container if store bought)
  • Approx 2-3 cups Red and Orange coating chocolate
  • Yellow and Red food paste
  • Candy sticks or Skewers

INSTRUCTIONS:
1) Follow the instructions for both cake mixes.  The yellow/white mix should be baked in mini loaf pans for the buns.  Let cool in pan for 5 minutes, then remove to cool on a wire rack.   
2) Bake the other cake mix in a 9x13 pan to use for make the "hot dog" cake pops. 
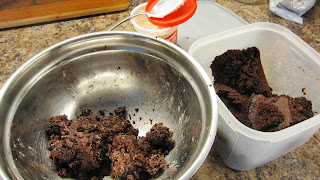
3) Once cake is cool, crumble into a bowl and mix with 2 cups of icing, reserving 1 cup of icing for mustard/ketchup icing toppings
4) Form the cake-icing mixture into mini logs about the length on the mini loafs and 1/2- 1 inch thick.  Place them on a parchment lined container or sheet.  Let the formed logs cool in fridge for several hours or freezer for half an hour. 
5) Melt the red and orange chocolate together in a medium bowl over a double boiler. Start with a small amount of each and add as needed to get a colour close to hot dogs.  Gently place the hot dogs on to the candy sticks or skewers, one at a time and dip into the melted chocolate to cover the cake.   Tap off excess. 
6) Stand up the cake hot dog in a cup or Styrofoam to cool and dry. 
7) While the "hot dogs" are drying, carve out a groove in each mini loaf cake using a small circle cookie/fondant cutter for the hot dog to sit in. 
8) Remove the sticks from the dried "hot dogs" and place one into each loaf groove.
9) Using yellow and red food paste die half the remaining icing red and half yellow to create ketchup and mustard.  Place each into a piping bag with tip 2 or 3.   Zigzag icing on each "hot dog" to create the look of condiments on the "hot dogs". 

These were a hit!  There were a lot of double takes.  People couldn't believe it was actually cake.  Super cute and cool, I think.    Perfect for a end of summer BBQ.

MEG's RATING : D-EEEEE-LICIOUS!    (mostly based on fun and creativity)


Friday, April 1, 2011

Cake eggs in a chocolate haystack basket

Easter, chocolate, eggs, cake pops, dessert, holiday, butterscotch, Chinese, colour, cake, buttercream, icing


I can't even tell you how excited I was to make this dessert.  Once I got it in my head that I was going to do this, I was pumped and then very anxious to see how it would turn out.   For some reason,  I love baking with easter chocolate.  Maybe it's the colours or simply how the chocolate and candy eggs can be incorporated in so many different ways. Easter baking is too much fun!  You can probably expect to see quite of lot of great chocolate egg desserts in the next three weeks.  I was originally thinking I would just make the little cookie haystack nests with mini eggs sitting on top but then realized I could bring this dessert to a whole new level.   This is centerpiece worthy, colourful, pretty and completely edible.  My co-workers didn't even want to crack in to it because it looked to beautiful too eat.   Don't worry eventually we all dived into it.


Cake egg pops in a Haystack basket

INGREDIENTS:

Cake Pop:
  • Your favorite prepared cake - I had left over chocolate cake in my freezer.   I used about 850 gr. 
  • Your favorite icing - 250 gr
  • Coloured chocolate
  • Candy sticks or wooden skewers


Haystack Cookies
  • 3 cups semi-sweet or dark chocolate  (your preference)
  • 2 cups butterscotch chips
  • 4-5 cups (500 grams)  of chow mien noodles, slightly crushed
  • 1 1/2 cup praline peanuts
Basket peices
  • Edible grass
  • Easter jelly beans


INSTRUCTIONS:
1) Make the cake pops.  Crumble up the cake and mix it together with the icing until all incorporated.


2) Form the cake into eggs either free hand or using an egg mold.  Put them in the fridge or freeze to set the shape before dipping. 

3) Melt the chocolate and butterscotch chips over a double boiler.  Stir to mix together and incorporate,  until completely melted.


4) Once completely melted add the chow mien noodles and peanuts and stir together with a wooden spoon or spatula to ensuring you are covering all the noodles and peanuts with the chocolate.


5) Layer a large bowl with parchment (I used a wooden salad bowl so it was a bit flatter),  placing some of the chocolate noodles on top of the parchment pressing down to form a bowl.  Continue to add some more noodles on the edges to create the sides of the bowl.  Let the chocolate set in the fridge for an hour or on the counter for a few hours until dry.


6) Coat the cake eggs :  Melt the coloured chocolate in a double boiler.  Ensure you have a enough so that you can dip or roll the cake egg.   Remove a few cake eggs at a time from the freezer and insert a candy stick or wooden skewer through the large end of the egg.  Going in approximately half way up the way.   Dip the egg into the chocolate, allowing extra chocolate to drain off, tap off any excess.   Place the egg pop to dry in some Styrofoam or dried flower foam.


7) Once both the bowl and eggs are set place some edible grass (which I found at the bulk barn) in the bottom.  Place the cake eggs and some jelly beans inside of the bowl in the arrangement of your choice.


This was fantastic in so many ways.  How can you not like cake, covered in chocolate in a cookie bowl also covered in chocolate.   It is fun to pick out your favorite coloured egg and then even more fun to break apart the nest and eat the pieces.   Decorate your easter table with this beautiful colourful dessert your family will love it.

MEG's RATING : D-EEEEE-LICIOUS!


Wednesday, October 27, 2010

A busy baking weekend part 2 - Halloween cake pops

The benefits of making a chocolate cake for someone else is the possibility of leftover cake bits from shaving and smooth to make the cake flat.   What is the best thing to do with these extra pieces?  Well thanks to Bakearella - Cake Pops.   I am jealous of her creativity,  her book is awesome and I now have a new goal to try and come up with my own characters and items.   I made the Santa hats and trees last year at my Christmas party and they were a hit so I figured I would try again and make some Halloween style treats for work.  So I am attempting pumpkins and ghosts. 


What you need:

  • Cake - Your own homemade, boxed, store bought. 
  • Icing - Store bought or homemade
  • Orange and White Chocolate
  • Something for a Green stem - Now Bakarella uses Tic Tacs, I however used green sprinkles because I forgot to pick up Tic Tacs at the store.   I recommend using the Tic Tacs.  HAHA  They look much better. 
  • Edible markers - and I stress GOOD ONES!


Step 1 - Crumble the cake (assuming it is already baked) and mix with icing - Hands are easiest.   A 13x9 cake would use 1 typical container of icing. 


Step 2 - Take pieces of mixture and roll into balls or whatever shape required.  In this case I did balls or pumpkins and then cylindrical shapes wider at the bottom for the ghosts.   Put these in the fridge or freezer to get cold and stiff


Step 3 - Melt the chocolate using a double boiler, place the cake pops on a candy stick and dip and roll in the chocolate.   Tap of the excess and roll around to remove dripping.    Put the pop in Styrofoam to dry.


Note:  If you are making the pumpkin ones, you need to add the green stem right away before the chocolate dries. 


Step 4 - Once they are all dried you can add your faces.   This is where a really good marker comes into play,  I was using a Wilton marker and found it just didn't cut it for drawing on chocolate.  It was hard to get it to work at all and when it did it was very streaky - as you can see from the photos. 


Despite the streaky faces, they were eaten up at work pretty quickly and everyone thought they were quite cute.   I will definitely attempt cake pops again and will repeat my Christmas pops in a few months.    I suggest you try your own cake pops and I would love to know how they work out and if you created anything new. 


Meg's rating - D-EEE-LICIOUS!    It's hard to go wrong with cake, icing and chocolate especially when I made my the cake myself, but warranted less E's because it was store bought icing.  :-P 


BONUS # 2


Another benefit of making a chocolate cake for someone is you may have extra batter that you turn into chocolate cupcakes.     So what do when you have chocolate cupcakes, and no icing but melted chocolate???     Dip the cupcakes in the chocolate of course!   I dipped a few in orange chocolate and few in white chocolate, put on a some quick fondant decorations et VOILA!!!


Pumpkin Cupcakes

My artistic shot

Mummy Cupcakes


Related Posts Plugin for WordPress, Blogger...