Image Map
Showing posts with label tarts. Show all posts

Monday, September 29, 2014

Rhubarb and Raspberry Galette - Messy Baker Monday


Have you heard of The Messy Baker?    She is a fellow Canadian food blogger,  who cooks and bakes delicious and beautiful dishes and treats.   She also happens to have an amazing cookbook coming out that will tempt you even further.   Her book is full of appetizers, mouth watering baked goods and showstopping desserts.   This is honestly one of those books where you scroll through and if you were to mark the pages of things you really wanted to make with paper, there would paper flaps hanging out of almost every page.

Several bloggers and I have all gotten together to tease you with some of the wonderful dishes from her book.   If you like what you see I highly suggest you put The Messy Baker on list of cookbooks to purchase you will not be sorry.

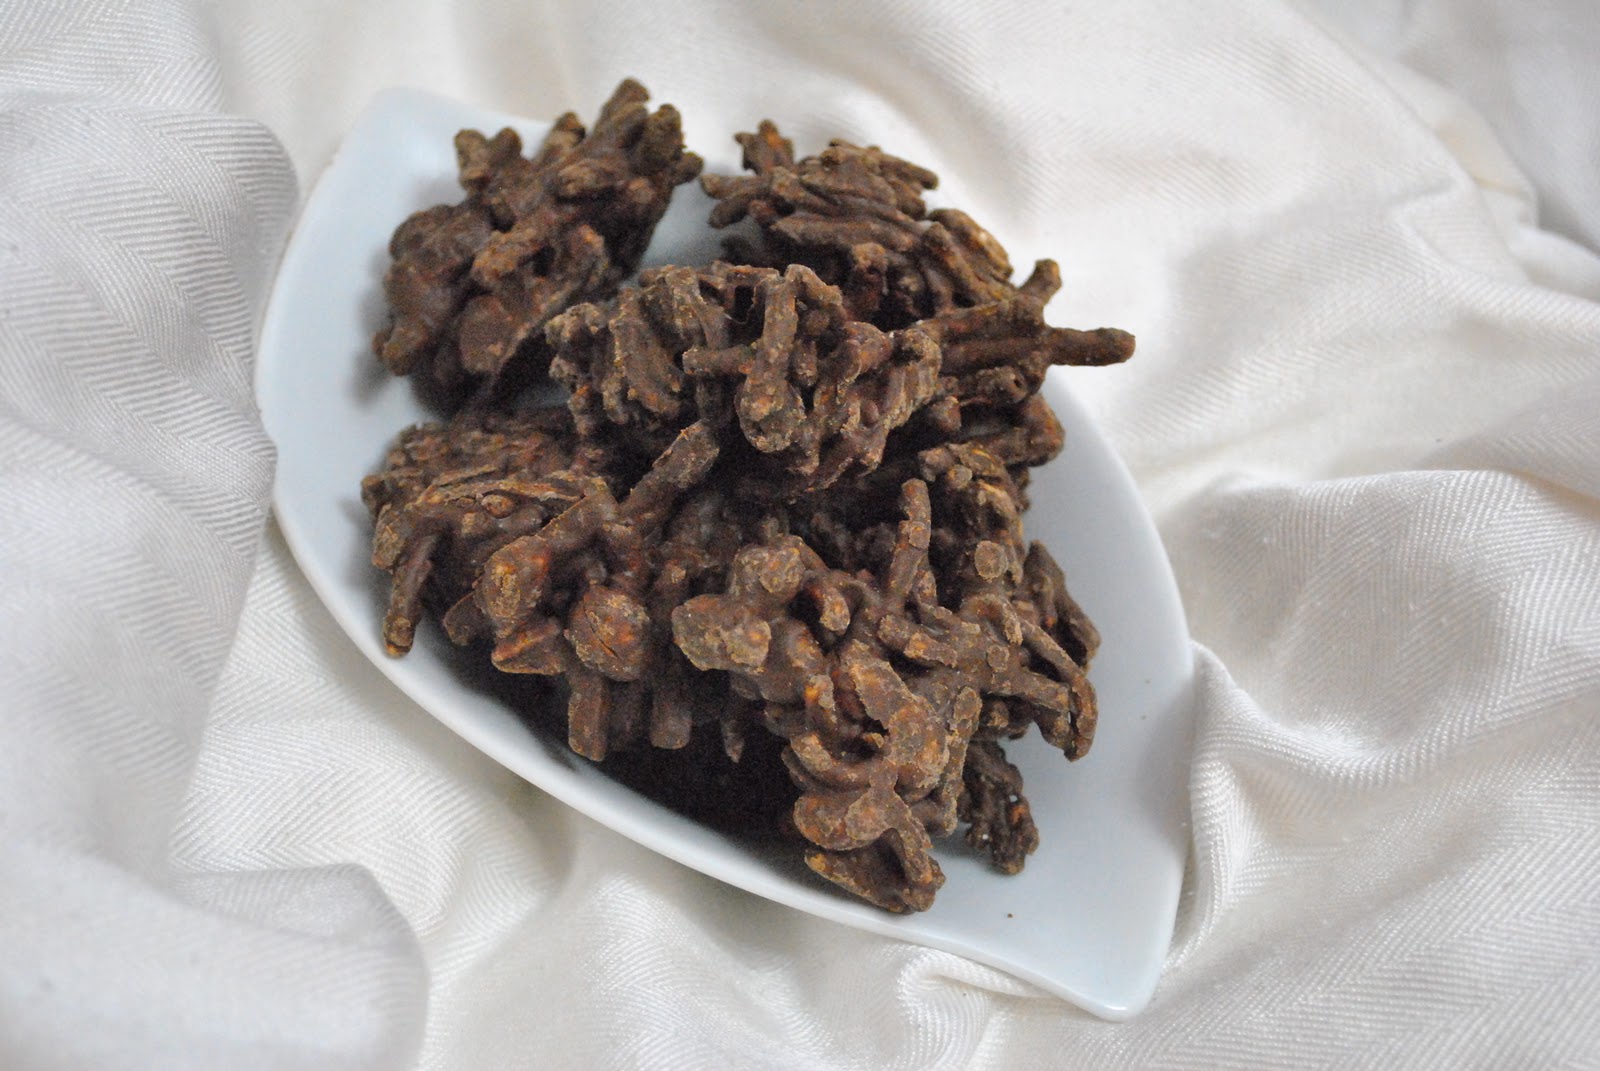
This recipe for Rhubarb & Raspberry Galette with Fragipane was delightful.  The recipe uses one of her versions of No Fail pastry crusts.  I did the one with butter and it was so easy and perfectly flaky.   Next on my list to make from this cookbook is the Mushroom, Leek and Gruyere Tart or the Cherry and Lemon Macaroon Meringues,  which you can see below.


Check out the links from my fabulous blogging friends to see more Messy Baker delights.  If you want to see all the recipes though you are going to have to pick up a copy of this book for yourself.  Buy Now!

Whiskey Kissed Pecan Pie
Blueberry Lime Cornmeal Muffins
Chili Cheese Twists
Cherry & Lemon Macaroon Meringues
Ginger and Vanilla Scones
Piglet Muffins with Caramelized Bacon
Profiteroles
Double Stuff Uber Oreos
Basil & Aged Cheddar Scones // Deep Dark Cherry and Chipotle Brownies
Pecan Cheddar Bites
Tomato/Arugula Stuffed Focaccia
Smoked Paprika Corn Fritters
Welsh Griddle Cakes


Wednesday, July 17, 2013

Strawberry Almond Tart


I went strawberry picking twice this year.  It was hard not too really.  I left the first picking with at least 4 litres of strawberries and they tasted soooo good. I knew they would not be enough.  I froze over half of the first batch, ate some and then used some for a cake.  I went picking with a friend and we just sat the babies on the side of the patch and they just watched us, played and tried to eat the hay on the side of the patch.  The first picking was also the first time my little one has strawberry.  It was pretty cute.  She just numbed it down with her gums.  The second time I went with my SIL and niece and nephew.  This batch which was another 4 litres was brought to the cottage, eaten by 8 of us in a fruit salad and then made into this delicious tart.


Love local fruit. I am hoping to go raspberry and green bean picking this week. No baking will be done with the green beans, except for maybe a quiche.

I also mentioned I did a cake,  I did my first topsy turvy cake and it was so much fun.   I was pretty happy with how this turned out.  It was bright, funky and fun.   It also turned out to be quite the hit of the bridal shower so my friend told me.   Something I always love to hear from my customers.  This was a gluten free vanilla cake with strawberries and cream icing.   YUM!


Saturday, March 30, 2013

Almost No Bake Chocolate Malt Tart


So I have spent the last several months it would seem going through most of my cookbooks and making notes of recipes I like and want to play with.  A list that should last me for quite some time now.   During this process, which started because we got new cupboards I also decided to go through several of my magazines and tear out recipes and tips that I deemed were most important.  The rest of the magazine would get recycled in an effort to maximize cupboard space.   This way I could make room for more magazines and more cookbooks. :-)   This tear out process if you will left me with the following...


After I had a huge stack of papers,  I then separated it into desserts and savory items, which were then separated into chicken/beef/pork etc and desserts were separated into breakfast, cookies, cakes, pies, etc.  I am happy to say that 90% of the papers are now in binders and all organized, just in time to have the family over for Easter.

Happy Easter Everyone!


Almost No Bake Chocolate Malt Tart

INGREDIENTS:

Pie Crust
  • 1 cup unbleached all purpose flour
  • 1/4 heaping cup cocoa
  • 1/4 cup malt powder
  • 1/4 tsp salt
  • 1/4 cup granulated sugar
  • 1/2 cup cold unsalted butter, in cubes
  • 1 large egg, cold
  • 1 tbsp almond milk
Filling
  • 1/2 cup cream cheese (1 package)
  • 3/4 cup whipping cream 
  • 3 tbsp agave 
  • 3 tbsp malt powder
  • 1 cup crushed malt eggs
Ganache
  • 1/4 cup whipping cream
  • 3 oz dark chocolate chips
  • 1 tbsp unsalted butter

INSTRUCTIONS:
1) Combine flour, cocoa, malt powder, sugar and salt in a food processor.  Pulse a few times to combine.  Add the butter and pulse until a coarse crumb develops. 
2) In a small bowl beat together the egg and milk.  Add to the processor and pulse until dough starts to come together. 
3) Turn the dough onto a lightly floured surface and bring dough together. Form into a disk, wrap in saran wrap and refrigerate for 2 hours. 
4) Preheat the oven to 350F. Remove from the fridge, let sit for 15-20 minutes.  Roll out to a fit a 9 inch tart pan.  Prick the dough with a fork.   Bake for 15 minutes.  Remove from oven and let cool. 
5) In a large bowl or mixer bowl, beat cream cheese, cream, agave and malt powder on medium high for 3-5 minutes until thick and fluffy. Fold in the crushed malt eggs.  
6) Spread the mixture into the chocolate crust.  Place in the refrigerator for 20 minutes.
7) Place chocolate in a heat proof bowl. Heat cream and butter in a small sauce pan until simmering and bubbling on the outside. Pour cream over chocolate, let sit for a few minutes.  Stir together, then spread over tart.  Top with a few malt balls and place back in the fridge to set. 

I love chocolate malt balls, especially pretty egg malt balls.  I always must find a reason to bake or well no bake with them.


Friday, January 18, 2013

Pecan Cherry Butter Tarts and a Giveaway!


My little girl is two months old as of yesterday.  Wow, this has been a fast two months but an awesome two months. A few small moments of insanity off set by a million moments of joy and laughter. I think we spend half our days now sticking out our tongue and blowing our lips trying to make her smile.  We survived our first set of shots this past Monday quite well. Might have been worse for Mommy than baby.  I even sit here finishing up this post as she just lays beside me,  not sleeping unfortunately but not crying.  She is just content at staring off to the ceiling.   Sleep training hasn't quite started yet, maybe another month or so and I am sure you will hear all about my trials and tribulations.  Any tips the moms out there would like to offer in advance?

I needed a break from cookies and bars so here are some yummy gooey tarts to tempt you.   See below for the the giveaway.


Wednesday, November 16, 2011

Free Form Apple Tarts


I promise this is the last apple recipe for a little while.  What can I say,  I had access to a lot of free apples so I took advantage of it.  I could bake even more with apples,  but I will stop.   Although I am very interested in making another apple loaf, but this one will be more savory.  I will save that recipe for a later date and put the apples away for a few weeks.

Today I am giving you a very easy sweet dough recipe.  This dough recipe is frankly never fail.   If you have difficulty making a pie dough come together, this is your fall back.  This dough is not put together in a traditional pie dough way.  The butter/shortening in this dough are soft and creamed with sugar like a cake or cookie instead of cut in cold.  It is not meant to be a overly flaky dough.   I know it may seem crazy but trust me this dough is delicious.   It holds together really well and you don't have to worry about breaking and cracking.

These tarts are really easy to put together and great as an individual dessert.  Top with a scoop of ice cream and you are set.

Apple Tarts – Makes 6 – 6 inch tarts

Dough (Yields enough for 12 tarts)
·         1 cup + 1 tbsp (250 grams) shortening, room temperature
·         1/4 cup (50 grams) unsalted butter, room temperature
·         2/3 cup granulated sugar
·         1 teaspoon salt
·         1 teaspoon lemon extract
·         1 teaspoon vanilla extract
·         1 large egg
·         75 ml milk
·         1 2/3 cups pasty flour
·         1 2/3 cups all purpose flour

Apple Filling
·   4 Medium apples – cored, peeled and thinly sliced
·  1 1/2 tbsp all purpose flour
·  1/3 cup granulated sugar
·   Juice from half a lemon
· 3/ 4 teaspoon cinnamon


INSTRUCTIONS:
1) Make the dough: Combine the first 6 ingredients of the dough in a large bowl/mixer bowl. Beat together until incorporated and smooth. Add egg, beat to combine.


2) Add the flour, beat on low. While beating slowly add the milk. Beat until mixture is starting to come together.
3) Turn out dough onto a flour surface and bring together with your hands to make two round discs. Cover with saran wrap and chill for minimum 1 ½ hours.


4) Make the filling: Combine apples and lemon juice. Sift flour, sugar and spices over the apples and toss together. Set aside while rolling out the dough.

5) Line a baking sheet with parchment/silpat. Preheat oven to 375F. 

6) Remove one disc of dough from the fridge. Lightly flour your table/counter top. Roll out the dough to 1/4 thick. Cut out 6 inch circles. (I used a 6 inch pan and a pizza cutter, doesn’t have to be exact)

7) Place one circle on the baking sheet, layer the apples slices in the center of the circle. Leave about a 1 inch around the apples and fold up the extra dough over the apples.

8) Repeat with remaining discs and apple slices. 


9) Bake for 45-50 minutes. Dough with be golden brown. Remove from oven. Serve warm with vanilla ice cream.

Desserts like this are just so warm and comforting.  I am going to take my tart and ice cream and cozy up to the fire.

Thank you to Believing Boldy for also posting these tarts on her site as part of her 30 days of desserts.   She has a lot of wonderful recipes from herself and other bloggers.  Take a look!

MEG's RATING : D-EEEE-LICIOUS!

Saturday, August 6, 2011

Peach and Berry Tart


 The month of pies/tarts continues.... We were off to the cottage for the August long weekend and in a fantastic coincidence it is also peach season.  I browsed through my Martha Stewart Pies/Tarts book and wouldn't you know it, there are two recipes calling for peaches.  One was mini peach tarts using puff pastry, the other was a peach and berry tart with a flour cornmeal crust.   I choose the later, a flour cornmeal crust, how intriguing!  Both the filling and crust looked quite simple to put together and that is always a big plus when life makes you short on time and when the weather makes you not want to bake.   Here is pie #2 for the month


INGREDIENTS:

Crust
  • 3/4 cup unbleached all purpose flour
  • 1/2 cup yellow cornmeal (preferred stone ground but that is not what I used)
  • 3 tbsp granulated sugar
  • 1/4 tsp salt
  • 1/3 cup + 1 tbsp unsalted butter, cut in to small cubes
  • 1 large egg yolk
  • 1/2 tsp pure vanilla extract
Filling
  • 3-4 small/medium sized peaches, sliced into wedges
  • 3/4 cup assorted fresh berries
  • 1/4 cup brown sugar

INSTRUCTIONS:

1) Make the crust: Preheat oven to 400F.  Add all crust ingredients into a food processor and pulse until dough just begins to come together.


 2) Press the dough into the bottom of a 9 inch tart pan and up the sides.  Bake until golden and slightly puffy, about 15 minutes.   Remove from the oven and press the center of the crust gently with an offset spatula. 
3) Make the filling : While the crust is baking combine the filling ingredients in a medium bowl and toss together.


4) When the crust is complete, reduce the oven to 375F.   Arrange the fruit on top of the crust.  Bake until peaches are tender and lightly golden, about 30 minutes.  Let cool on a wire rack.  Serve warm or at room temperature. 


This crust was so interesting.  I can understand why the recipe preferred stone ground cornmeal but I rather enjoyed the texture it had with the slightly coarser cornmeal.  The cornmeal also gave a nice flavour
I actually accidentily overbaked this, recovered the berries with some new ones and this still turned out pretty great.  It was a easy as it looked and the crust was easy to handle.  


MEG's RATING: D-EEEE-LICIOUS!


Sunday, January 2, 2011

Chocolate tarts

Every and any holiday dinner with my Dad, it is a requirement that I make my apple crumble. However I also find it a requirement to make another dessert, preferably with chocolate for my non fruit eating Husband.   I rifled through my many baking magazines to see what I could create...cookies, brownies, bars, cheesecake, tarts?  Yes, Tarts!  The recipe I found was actually for a s'mores tart that had a graham cracker base, chocolate pastry cream and a marshmallow meringue on top, however I wasn't in the mood for a marshmallow meringue so I choose to do my own Christmas spin.

Chocolate Hazelnut Tarts

Adapted from Cuisine at Home, Holiday Baking

INGREDIENTS:

Crust:

  •  3 oz hazelnuts, toasted & skinned (1/2 cup)
  • 9 2 1/4 x 5 inch graham crackers
  • 2 Tbsp white sugar
  • 1 stick unsalted butter, melted

Pastry Cream 

  • 2 eggs
  • 3 tbsp hazelnut syrup or liqueur, divided
  • 1/4 cup cornstarch
  • 1/4 tsp salt
  • 2 cups milk
  • 1/2 sugar
  • 2 oz each bittersweet and milk chocolate, chopped
  • 2 tbsp unsalted butter, softened

My Variation

  • 3 oz praline pecans
  • 2 tsp pure vanilla extract
  • 2 oz mint chocolate chips
  • Small handfull mini eggs

INSTRUCTIONS:

1) Make the Crust : Preheat the oven to 375F.   Put the hazelnuts, graham crackers and 2 tbsp sugar in a food processor and run until fine.  With the processor running, drizzle in the melted butter.   Divide the mixture evenly amoung eight 3 inch tart pans with removable bottoms.  Press the crumbs up the sides and press the bottoms with a flat object similar to a cheesecake base to make the firm crust,   Bake the tartlets crusts for 10 min and then let cool.


2) Make the Pastry Cream : Whisk together the 2 eggs, 2 tbsp hazelnut syrup, cornstarch and salt.  Set aside. Heat the milk and sugar in a medium sauce pan over medium heat until steam rises. Gradually whisk in both chocolates until melted and fully combined with milk.
3) Whisk half of the heated mixture into the egg mixture; return the chocolate egg mixture to the remaining milk chocolate mixture in the pan.   Continue cooking on medium heat, whisking often until it thickens.    Boil for 1 more minute constantly whisking to avoid scorching.
4) Stir in the 2 tbsp butter and remaining hazelnut syrup.  Divide pastry cream evenly amoung cooled crusts.   Let tartlets cool to room temp, cover them with plastic wrap touching the filling to prevent a film.


MY VARIATION:  I did make a few tweaks based on what I like and had in the cupboard.
1) My crust variation involved pecan pralines instead of hazelnuts.   Good call # 1.
2) My pastry cream variation involved removing from the hazelnut syrup/liqueur, although I do enjoy amaretto since I removed the hazelnuts from the crust, I just decided to go with just pure vanilla extract.   I also did use all milk chocolate.   I used semi-sweet chips for some and then mint chocolate chips for half.   After the cream  thickened I split the mixture in two and added some mint chocolate chips and stirred until they melted.  Once it was all combined then I added that mixture to some shells and the non mint to the other shells.
3) My topping variation:  Instead of the marshmallow topping, I added some of the crushed mint chips to the mint tarts and some Christmas mini eggs to the plain chocolate tarts.

Another great dessert. I think this crust could have lots of possibilities, especially in a cheesecake.   The praline pecans are a great addition to the typical graham crust.   I am oddly not a big mint chocolate fan but the rest of the dinner table gave them a thumbs up.    You can pre-bake the shells and cream and cover them with saran wrap overnight if needed or to save time on a busy night.   An interesting thing I am finding about this blog is that when I start to write about something I baked I begin to think of all these other variations I could do.  Lots more tarts to come, I guess.....

MEG's RATING: D-EEE-LICIOUS!


Thursday, December 23, 2010

Butter Tarts and Chocolate Chow Mien Cookies


For the last several Christmas' my Mother, Sister and my niece and I get together for Mother/Daughter baking day.  The focus : Ooey Gooey Flaky Butter Tarts.  My mom found this recipe from Canadian Living, but she made a few tweaks, passed it on to us and we have been making it ever since.   It's great for us to get together and spend the day baking, laughing and sharing so we always make a point to set up this day.   Along with the butter tarts we also make Chocolate Chow Mien Noodle cookies, Hay Stacks, Spider cookies or Oodle Kadoodles, whatever you want to call them.   They maybe the easiest cookie ever, but they are so addictive and yummy.


Butter Tart INGREDIENTS:

Dough (Tenderflake - makes 6 pie shells about 3-4 dozen tart shells)

  • 5 1/2 cups all purpose flour
  • teaspoons salt
  • lb tenderflake lard
  • 1 egg, stirred slightly
  • tablespoon vinegar
  • 7/8 cup cold water
Filling: (makes about 12 tarts)
  • 1/2 cup Brown Sugar
  • 1/3 cup corn syrup
  • 1 egg
  • 3 tbsp Butter, softened
  • 1 tbsp Vinegar
  • 1 tbsp Vanilla
  • Pinch Salt
  • A few in each tart - Raisins or Cranberries
INSTRUCTIONS: 
1) Make the dough :  
  • Stir the flour and salt together.   Cut in the lard with a pastry blender until the shortening is in pea size pieces. In a measuring cup, combine the egg and vinegar. 
  • Add enough cold water to make one cup.   Stir the liquid into the flour mixture, adding just enough to make the dough cling together.  Stir the water in with a wooden spoon until mixed thoroughly, then gather the dough into a ball, and separate into 6 portions. 
  • Cover and refrigerate for one hour, you can chill overnight, covered, providing you leave it at room temp for 15 mins before rolling. 
2) Make the filling :  In bowl, vigorously whisk brown sugar, corn syrup, egg, butter, vanilla, vinegar and salt. 
3) Roll, Cut and Fill:  On a lightly floured surface roll out pastry to 1/8-1/4inch thickness. Using about a 4 inch round cutter cut out circles.   Re rolling as needed.   
4) Spray the muffin tin or grease/flour and place in the dough to make a cup.  Add a few raisins at the bottom of each tart and then add the filling to about halfway to 2/3 full.   You do not want to overfill or the tarts will not remove from the pan easily.    
5) Bake at 350F for about 18minutes or until filling is just set and golden.

OUR VARIATIONS AND RESULTS:
We try and get a head of the game and make the dough ahead of time but this year none of us had time so we started from scratch.  Unfortunately we had issues with the first few batches of dough.  We always tend to use the crust recipe from the Tenderflake shortening box and we did this time but we didn't actually have Tenderflake, we had no name lard.  So we ended up with 5 rounds of dough that just didn't want to stay together.    At this point I went to my never fail dough, it's more of a sweet dough than a flaky dough but its really good and it worked.   PHEW!      My sister likes when the butter tarts have the wavy look just so when she puts them into the muffin tin she adds the bumpy look.   That choice is totally up to you, but it definitely gives them the homemade feel.    We did also put some cranberries in about a dozen instead of raisins.  Different but quite nice.  In the end we made about 8 dozen but due to some over filling and some broken shells we didn't quite get that many.  Not such a large tragedy though eating the broken pieces is still fun.
Ooops! Sorry about the your recipe Mom!  


MEG's RATING : D-EEE-LICIOUS!!


CHOCOLATE CHOW MIEN COOKIES

While we were waiting for the dough to chill and remaking the new dough, my sister made the cookies.
They are really quick and easy and require no baking!   We don't really use a recipe but for guidance I adapted the one from Hershey.

INGREDIENTS: (makes about 4 dozen)

  • 3 cups Chow mien noodles - slightly crushed
  • 2 cups semi-sweet chocolate chips (1 12 oz package)
  • 1 2/3 cups peanut butter chips (1 10 oz package)
  • 1 cup chopped peanuts 
  • 1 cup raisins
INSTRUCTIONS: 
1) Melt both chips in a double boiler.   Add chow mien noodles a cup at a time and mix so they are all covered in chocolate.  Add peanuts and/or raisins.  You don't have to do both.
2)  Drop a heaping spoonful on a baking sheet lined with parchment or silpat. 
3) Refrigerate or (put in your cold garage as what we did) until set. 

Seriously, that is it!!   I know it may seem odd with the noodles but trust me.  These are a great easy treat! Great for doing with kids as well, they may just want to eat the noodles covered in chocolate.  Case in point <<
Try experimenting with different nuts or butterscotch chips....or even skor bits.  :-)

MEG's RATING : D-EEE-LICIOUS!


Related Posts Plugin for WordPress, Blogger...