Image Map
Showing posts sorted by relevance for query coconut chocolate. Sort by date Show all posts

Tuesday, August 30, 2011

Coconut Chocolate Pie


MAR 11, 2012 - NOTE: Check out my updated version of this pie with a salted caramel layer!!!


To close off the month of pies I decided to go with something decadent and different.  A pie with a less traditional crust and a simple filling that will make you melt.  It has been a fun month trying new fillings, new crusts, some pies with fruit and some with creamy chocolate fillings. Pie options are endless. The good thing is I barely made a dent in Martha's book.   There are still so many wonderful looking recipes in her book I would love to try, so there maybe a month of pies round 2 in the next year.   Hope you enjoyed all the pies this month and hope you can create your own sweet twists on them.  


(Adapted from Martha Stewart)
Makes one 9-inch pie.


INGREDIENTS:

Crust
  • 1/4 cup + 1 tbsp unsalted butter, softened
  • Approx 4-5 cups unsweetened shredded coconut
  • 1/4 cup granulated sugar
Filling
  • 1 cup heavy cream
  • 8 ounces bittersweet chocolate, finely chopped (around 60% cacao)

INSTRUCTIONS:
1 Make the crust: Preheat the oven to 350°F. In a food processor, process butter and one-third of coconut and sugar until mixture forms a ball or starts to stick together, 1 to 2 minutes. Transfer to a medium bowl. Combine this mixture with the remaining two-thirds coconut using your hands to bring together


2 Press coconut mixture into bottom and up sides of pan to form crust, leaving top edges loose and fluffy. Cover the crust lightly with tin foil over the edges, and cut a hole in the center.  Keeping the edges covered to prevent burning. Bake until center begins to brown, 10 to 15 minutes; remove foil and bake until edges are browned, 4 to 5 minutes more. Transfer crust to a wire rack to cool completely.


3 Make the filling:  In a small sauce pan bring cream just to a boil.  While cream is heating up, place chopped chocolate into a medium heatproof bowl.  Pour the cream over the chocolate and let sit for 10 minutes to allow chocolate to melt.  Stir to combine and melt remaining chocolate.  The mixture should be smooth and completely melted. Pour into coconut crust. Refrigerate until filling is set, 1 hour or up to 1 day. 


If you like chocolate and coconut together you will love this pie.  The coconut crust is simply awesome, crunchy and  I need to come up with more ways to use this.   Both crust and filling were in perfect proportions.  Using a dark chocolate I think is also critical so the pie doesn't become overly sweet.

MEG's RATING: D-EEEEE-LICIOUS

coconut, chocolate, pie


AUGUST MONTH OF PIES SUMMARY
Strawberry Pie
Peach & Berry Cornmeal Tart
Mississippi Mud Pie
Blueberry Peach Pie
Coconut Chocolate Pie

Other Pies from Year
Blueberry Goat Cheese Pie
Peanut Butter Banana Ice Cream Pie
No Bake Strawberry Cheesecake Tart
Mint and Mini Egg Chocolate Tarts


Tuesday, October 22, 2013

Almond Joy Cheesecakes


This past weekend I made 120 cupcakes and a mini 6 inch cake for a wedding, and two weeks ago I made a 3 tier lemon coconut cake for a wedding.  So October has been busy.  My next cake with be for my little ones FIRST birthday. What? First birthday already! Where did this year go?  I cannot believe in it less than a month it will be here.  I have sent out the invites but now I need to start planning decorations, food, loot bags.. am I missing anything?

Thursday, September 1, 2011

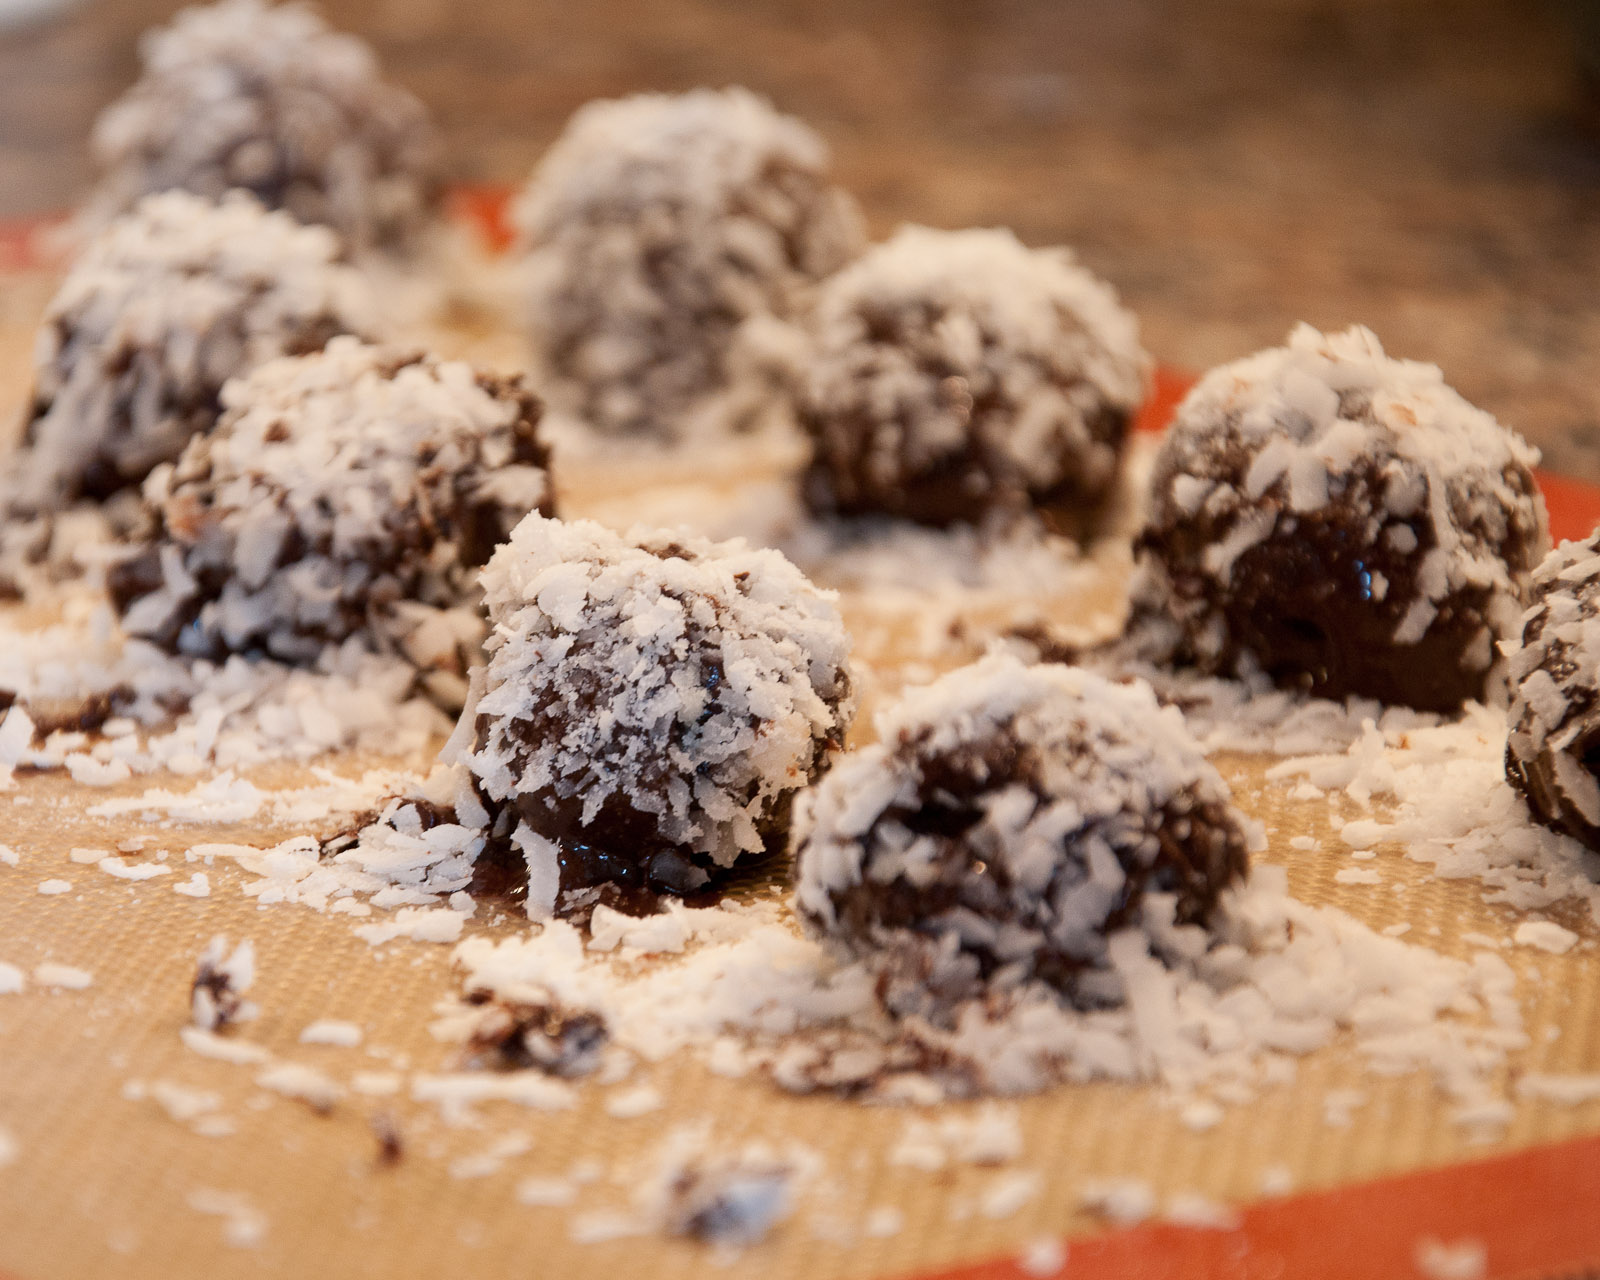
Coconut Truffles - Daring Bakers Candy Part 2


For my second candy option in the challenge I decided to make some truffles.  Apparently I am in a chocolate coconut phase. If you really think about it there isn't a big difference between these truffles and the Chocolate Coconut Pie I just posted.  Both made from using a chocolate ganache,  and both techinically have coconut on the outside.  Ooops..They were actually made over a week apart, so I really wasn't planning it.  I am just behind and I couldn't post the truffles until now.   Let's consider the truffles the mini snacking version of the pie.  The quick bite size version, that you can eat four of.  Haha.


INGREDIENTS:
(Adapted from Daring Bakers)

  • 1 3/4 cup (250 grams) dark chocolate, finely chopped
  • 2/3 cup heavy cream 
  • 2 tsp coconut extract
  • 1/2 shredded coconut, finely processed
  • 125 grams dark chocolate, melted
  • 1/2 cup shredded coconut, chopped.


INSTRUCTIONS:
1) Place the chocolate and coconut in a heat proof bowl.  Heat the cream in a small sauce pan until it is just about to boil.  Pour the cream over the chocolate/coconut mixture. 


2) Allow to sit for 5-10 minutes and stir to combine until completely melted.  Stir in coconut extract.  
3) Let the ganache sit and cool to firm up so you can scoop out balls.  Using a teaspoon or melon baller scoop out ganache and roll into balls.
4) Lightly coat each ball or simply tap each with some melted chocolate.  You just want them to be slightly sticky so the coconut sticks.


I don't need to say much here.  It's chocolate and coconut.  Truffles are a great entertaining option, they can be cute and beautiful. Easy to make and easy to EAT!

MEG's RATING : D-EEEEE-LICIOUS!


Sunday, March 11, 2012

Chocolate Salted Caramel Pie (ie.Best Pie EVER!)

(Note : This photo is the dulche de leche version)


After I made the original version of this pie the first time I was always looking for another reason to make it again.   I was also thinking I need to change it.   The crust on this pie is so easy and I love that it is gluten free.  So over the last year the one thought that would never leave my head was adding a caramel layer to the pie.  However, over the year I got side tracked with other recipes.

One fine day a week ago...there was a reason.  Yippee!  It was the birthday of my good friend Katie who I work with and I wanted to bake her a birthday treat.   I had to do a little re-con and ask her husband secretly through facebook what she loves for dessert.   His response was anything coconut, red velvet, lemon and salted caramel.   Ding Ding Ding! We have a winner, I can make the pie.  I was so excited I could barely keep it a secret from her.

The original version of this pie (sans caramel) is the most viewed item on my blog.   Trust me when I say this,  this version is SOOOOOOO much better.     I also actually made two versions of this pie one with salted caramel and one with salted dulche de leche.   I wanted to see what version might be better, there is a clear winner.
coconut, salted caramel, chocolate, pie, bestpie


I made some changes to the crust from the previous version aswell, the original had way to much coconut.

Chocolate Salted Caramel Pie

(Loosely adapted from Martha Stewart)
Makes one 9-inch pie.


INGREDIENTS:

Crust
  • 1/4 cup + 1 tbsp unsalted butter, softened
  • 3 cups unsweetened shredded coconut
  • 1 cup sweetened shredded coconut
  • 2 tbsp xylitol or granulated sugar
Filling


Chocolate
  • 2/3 cup heavy cream
  • 6 ounces bittersweet chocolate, finely chopped (72% cacao)
Caramel
  • 3/4 cup sugar
  • 1/3 cup water
  • 1/3 cup heavy cream
  • 2 tsp sea salt
or exclude all of the caramel ingredients and use homemade dulce de leche --> Recipe

INSTRUCTIONS:
1 Make the crust: Preheat the oven to 350°F. In a food processor, process butter and 2 cups of unsweetened coconut and xylitol until mixture starts to stick together, 1 to 2 minutes. Transfer to a medium bowl. Combine this mixture with all the remaining coconut,  using your hands to bring together


2 Press coconut mixture into bottom and up sides of pie pan to form crust, leaving top edges loose and fluffy. Cover the crust lightly with tin foil over the edges, and cut a hole in the center.  Keeping the edges covered to prevent burning. Bake until center begins to brown, 10 to 15 minutes; remove foil and bake until edges are browned, 4 to 5 minutes more. Transfer crust to a wire rack to cool completely.


3) Make the caramel sauce.   Place sugar and water in a sauce pan or small dutch oven over medium-high heat.  Allow the mixture to boil until mixture begins to darken, watching carefully so the mixture doesn't burn.
I always keep a pastry brush and small cup of water close by, and occasionally brush the sides of the pan to prevent crystallization.  If you noticed uneven browning, you may have to give the pan a light swirl.


4) When the mixture has turned to a medium amber add the heavy cream, whisking constantly.   The mixture will expand and bubble from the steam.   Add sea salt and stir to combine.


5) Allow the caramel to cool for approx 15 minutes before pouring into the cooled coconut crust.


6)) Make the chocolate filling:  In a small sauce pan bring cream just to a boil.  While cream is heating up, place chopped chocolate into a medium heatproof bowl.  Pour the cream over the chocolate and let sit for 10 minutes to allow chocolate to melt.  Stir to combine and melt remaining chocolate.  The mixture should be smooth and completely melted. Pour onto the caramel layer, smooth out if needed.  Refrigerate until filling is set, 1 hour or up to 1 day. 


If you are using the dulche de leche, omit the caramel steps and pour half can of dulche de lech over the coconut crust and top that with the chocolate.


I think this may be my favorite pie of all time. The people at work were two thumbs to both versions.  I even got a note left on my desk with the statement "AMAZING PIE".    If you have to choose between the salted caramel and the dulche de leche I would choose the salted caramel version.  It is less creamy but salted caramel just has that extra UMPH vs. dulche de leche.

Make this for your Easter dinner, your family won't be disappointed!!

MEG's RATING: D-EEEEEE-LICIOUS.   (That is one E above the limit!)


Pi Day Pie Party

Wednesday, July 13, 2011

Chocolate Coconut Gelato


Ever since I got back from Italy I have been raving about my "Bounty" coconut gelato, teasing you all with how fantastic it was.  It was time I ended the obsession and attempted to create this for myself.
Many wonder if there is a difference between ice cream and gelato?  There are so many different ice cream and gelato recipes on the Internet that the lines of distinction seem to get blurred quite easily.  Here are the key differences:
~Gelato has more milk and less cream.   Therefore also a healthier option
~Gelato has less air incorporated into it to keep it smoother and denser due to less cream.  This difference can be difficult to achieve using a home ice cream maker.
~Gelato is generally served and stored at a warmer temperature than ice cream, also difficult to achieve at home.
~Less fat in Gelato also means stronger bolder flavours since you are not fighting against the fat and creamy mouth coating.
Doesn't sound to encouraging for homemade gelato does it?  Many of the key differences are not easily achieved at home. It may be best to leave gelato up to the Italian pros.  I could always use another reason to go back there to get my gelato fill anyway.   Here is my first attempt.

Coconut Chocolate Gelato


Springtime M&M's if you are wondering.
INGREDIENTS:
  • 1 cup coconut milk 
  • 1 cup half and half (18% cream)
  • 1/2 cup granulated sugar
  • 4 egg yolks
  • 1 tsp vanilla paste
  • 1 tsp coconut extract
  • 3/4 cup finely shredded coconut
  • 3/4 cup m&m's or chocolate chips. 


INSTRUCTIONS:

1) Combine the milk, cream, half of the sugar and vanilla paste into a medium saucepan.  Bring the milk nearly to a boil. When the very first bubbles begin to appear, take it immediately off the heat and let it cool.  Cover the sauce pan to allow more flavour to develop.
2) When the milk has cooled to about room temperature, (not too hot,  it will cook the egg prematurely) put the egg yolks into an electric mixer together with the other half of the sugar. Beat at a high setting until the egg yolks and sugar have been totally combined and are pale, rippled and thin.


3) Reduce the mixer speed and slowly add your cooled milk in a steady stream. Mix until everything is well combined
4) Transfer the mixture back into the saucepan.  Heat the mixture gently until the eggs thicken it into a thin custard. You want the mixture to lightly coat a spoon. Do not let the mixture boil or it will cause the egg to curdle.   You want steam but no boiling.  Feel free to keep a bit of cold milk or cream close by if you need to bring down the temperature.
5)  Once the mixture has thickened,  remove it from the heat and stir in the coconut extract,  pour it into a bowl and chill the mixture in the fridge, several hours or overnight.  Cover with saran wrap tight to the mixture to avoid a film from developing.  The mixture will continue to slightly thicken as it chills.


6) Pour the mixture into your ice cream maker and run based on your machines instructions. My instructions call for churning of 20-30 minutes.
7) Add the coconut and half of the m&m's in the last 10 minutes.    Add the remaining m&m's by hand folding in before freezing.   Store in an airtight container before serving.


Did it live up to the hype you wonder?  Yes and No.   As I suspected this turned out more like an ice cream than gelato.  It really didn't have the light smooth creaminess a gelato has, partially because there were pieces of shredded coconut in it.    Although it wasn't the same as my Italian gelato it was still pretty darn good.   It really did taste like a frozen Bounty chocolate bar.

MEG's RATING : D-EEEE-LICIOUS!

coconut, gelato, m&m's, chocolate, ice cream

My ice cream collection to date:
Cookie Dough Ice Cream
Pralines and Cream
Peanut Butter, Chocolate and Oreo
Peanut Butter Cup
Coffee with Chocolate Chips and Toffee


Tuesday, April 5, 2011

Cupcake Trio


A group of fourth year marketing students at McMaster University spent the last semester creating a marketing plan for my baking business.   Oddly having taken the course myself almost 10 years ago, between working full time, taking courses and baking there is very little time to develop a business plan for the future.   Working with these students yields several benefits : 1) It’s free,  2) The amount of research/time they put into this 3) Fresh young eyes coming up with new ideas, who may be my target audience and 4) free publicity.     I met some of the students at the beginning of the year to answer any questions they had and where I wanted my business to go.   They were really great, very thorough and interested.  Fast track several months later we are now at the end of the semester,  the students have completed their paper and now have to present the plan to their marketing class.  I didn’t want them to go in to the presentation empty handed so I offered to bake them some cupcakes for the class.  I wanted to make sure they had a few different flavours so I put together a cupcake trio - Vanilla, Chocolate and Coconut. 

For the chocolate cupcakes I used my One Bowl Chocolate Cupcakes .  It's a quick and easy recipe with intense chocolate flavour.   Instead of using a star tip like I did before I used a large plain circle tip and made the little balls on top.  I also used half of a Nestle milk chocolate hazelnut bar, chopped finely and added on top of the icing. Adding a bit of crunch and nuttiness


VANILLA CUPCAKES
(Adapted from Billy's Bakery)

INGREDIENTS:
Makes about 15 cupcakes
  • 1 1/2 cups unbleached all-purpose flour
  • 3/4 cups granulated sugar
  • 1 tbsp baking powder
  • 3/4 tsp salt
  • 1/2 cup unsalted butter, room temperature in 1-inch cubes
  • 2 large eggs
  • 1/2 cup skim milk
  • 1/4 tsp vanilla paste
  • 1/2 tsp pure vanilla extract

Butter cream icing:
  • 1/2 cup butter 
  • 1/2 cup shortening
  • 2 cups confectioners sugar, sifted
  • 1-2 tsp milk, if needed
  • 1 tsp pure vanilla extract
  • 1/2 cup purple chocolate, melted and cooled
Fondant flowers for on top
  • 1/2 cup white fondant
  • Silver dragees
  • Daisy cutters

INSTRUCTIONS:
1)Preheat oven to 325F- convection.  Line cupcake pan with paper liners and put aside.
2) In your stand mixer bowl combine flour, sugar, baking powder, and salt; mix on low speed until combined using the paddle attachment. Add butter, mixing until just coated with flour and starting to form small beads


3) In another bowl, whisk together eggs, milk, and vanilla. With mixer on medium speed, slowly add the wet mixture, scraping down the sides of bowl if needed.  Beat until ingredients are incorporated and do not over beat.
4) Divide batter evenly among liners, filling about two-thirds full. Bake, until a toothpick inserted in the center comes out clean, edges just turning brown, 15-17 minutes.


Icing: 
1) Beat butter and shortening until whipped and creamy.  Add some of the shortening and vanilla and beat on low, increasing speed as the sugar become incorporated.  Repeat until all the icing is whipped in. 
2) Add in the melted chocolate and beat to incorporate.
3) Add the icing to a large piping bag with the star tip.   Swirl the icing on to each cupcake.  


Fondant Flowers: 
1) Using colour gels/paste and dye about 1/2 cup of white fondant to whatever colour you choose. 
2) Roll out the fondant, using confectioner's sugar for dusting.
3) Using a medium and small daisy cutter, cut out as many flowers as needed and place the small and large together using a tiny dab of water.  Add the silver gold dragee to the center.


LEMON COCONUT CUPCAKES
(Adapted from Canadian Living)


INGREDIENTS:

  • 1/2 cup unsalted butter, room temperature
  • 3/4 cups granulated sugar
  • 1 1/2 cups unbleached all-purpose flour
  • 1 tbsp lemon zest
  • 1/2 cup shredded coconut, sweetened (I pulsed 1/4 cup finer in my stand mixer processor)
  • 1 tsp baking powder
  • 1/4 tsp salt
  • 2 large eggs
  • 1/2 cup skim milk
  • 1/2 tsp pure vanilla extract
  • 1/2 tsp coconut extract
Cream Cheese Icing
  • 1/2 cup cream cheese
  • 2 tbsp unsalted butter, softened
  • 1/2 tsp coconut extract
  • 1 1/4 cup confectioners sugar
  • 1/2 cup flaked coconut

INSTRUCTIONS:
1) Preheat oven to 350F or 325F convection.  Line 12 cups with paper liners.
2) In a medium bowl combine the flour, coconut, lemon, baking powder and salt.
3) In your stand mixer bowl or a large bowl, beat butter and sugar in a bowl until light and smooth.
4) Add eggs one a time, beating on low after each to incorporate.   Add vanilla/coconut extracts and beat on low until just combined.


5)  Alternate adding the dry ingredients and the milk while mixing on low.  Start and end with the dry ingredients, using 3 additions.
6)  Spoon the batter equally into the 12 cups.  Bake for about 18 minutes until a toothpick comes out clean, edges just turning brown.
7) Let cupcakes cool on a wire rack before decorating.  Cupcakes can be stored overnight in a sealed container or in the freezer for two weeks.


Cream cheese icing
1) Beat butter and cream cheese in a bowl until whipped and smooth.  Add confectioners sugar and extract and beat until creamy and all sugar is incorporated.
2)  Spread a generous scoop of icing on top of the cupcake and spread using an offset spatula.   Place all the iced cupcakes on a wire rack over a baking sheet to catch excess coconut.  Sprinkle the flaked coconut on top of the cupcakes.


Cupcakes are so fun to play with. You can experiment with so many different things, icings, colours, flavours , toppings.  You may never see the same thing twice.    All of the recipes turned out really well.     I struggled for a long time to find a vanilla cupcake recipe I really liked, this one is it.  It is never fail, same with the chocolate. Both of them are very easy.   
This was the first time I tried the coconut recipe and it beat expectations.  The cupcake was moist and fluffy.  Adding the lemon really heightened the coconut experience.  They are a great combination together.   It is also impossible to go wrong with cream cheese icing in any fashion.
I am glad I could put these together for the students after all the hard work they did.  I am really looking forward to what they have put together.   

MEG's RATING: D-EEEEE-LICIOUS!


Sunday, December 12, 2010

A Day of Cookies

So far I am not very good at keeping up with this blog on daily/weekly basis but I am trying.  Here is what happened two weekends ago.   For the last couple years my friend Heather and I get together for a day of baking.  We pick about 4-5 cookie recipes and spend the day baking and enjoying the day together.   The goal is to try and pick cookies we wouldn't always think to make on a regular basis or that may be a little different.  We decided on the 5 cookies below.

1. Martha Stewart's Candy Stripe Cookie Sticks
2. Martha Stewart's Honeyed Almond Cherry Shortbread
3. Coconut Macaroons
4. Chocolate Thumbprints
5. Sugar Cookies

I will tell you now we never completed them all but it was close.   First step was to make the sugar cookie dough so that it could chill for rolling.  While I was making the dough Heather started on the Coconut Macaroons.  We decided to mix it up a little by putting a chocolate covered almond inside, putting our own spin on an Almond Joy.   I also discovered in this process of preparing for baking day that I own A LOT of Christmas cookie magazines, which only means A LOT of untapped recipes. A very exciting finding indeed.   The coconut macaroon recipe came from one of these magazines, 2009 Holiday Baking by Cuisine at Home.

COCONUT MACAROONS

INGREDIENTS :
  • 2 cups sweetened shredded Coconut (7 oz)
  • 2/3 cup sugar
  • 1/4 cup all purpose flour
  • 1 tsp minced orange zest
  • 1/8 tsp salt
  • 2 egg whites
  • 2 tbsp unsalted butter, melted
  • 1/4 tsp almond extract
  • 3 oz semisweet chocolate, chopped. 

INSTRUCTIONS:
1) Preheat oven to 350, line baking sheet with parchment or silpat.
2) Whisk together coconut, sugar, flour, zest and salt in a bowl.  Stir in egg whites, butter and almond extract.   Fold in chocolate.
3) Drop tablespoon sizes balls of cookie dough onto the prepared baking sheets.
Bake macaroons (one sheet at a time) until macaroons are firm to touch and lightly brown on the bottoms, 20 minutes.   Let macaroons cool on the baking sheet for 5 minutes, then transfer to a rack to cool.

OUR VARIATION :  Instead of putting in the chopped chocolate, we wrapped the coconut dough around a chocolate covered almond.  We also skipped the orange zest, mostly because we didn't have any.

We did find the batter spread a bit more than the picture but we did double the recipe so it was maybe a bit more runny than it was supposed.    There were quite tasty though.    I would attempt to make these again on other forms and make sure the dough was a bit drier to prevent spreading.

MEG'S RATING: D-EE-LICIOUS!


COOKIE STRIP COOKIES


We decided to move on to the hardest recipe next, which according to Martha this was her hardest recipe in her 12 days of Cookies.   Sadly we found this out and the video on how to complete them after we were all done.   Go figure!  We did not double this batch and thank goodness.  Although the batter looks small you use a tiny amount for each cookie as you need to spread the cookie into a very thin rectangle with offset spatula.   We went through several iterations of thickness and size and in the end, I will give the kudos to Heather who mastered it.  I seem to be useful when they were hot out of the oven and you had to roll them immediately into sticks.    My advice is to watch her video so you can really get a feel for how they look and how to much batter to use.
Recipe and video link :  http://www.marthastewart.com/recipe/candy-stripe-cookie-sticks

Martha suggests actually creating a rectangular template to ensure each piece is uniform but we didn't.   Depending on how many you choose to make using a template could take a long time.
It is also tricky to not have a portion of the cookie brown which can make it difficult to roll.  These cookies were cool but time consuming.  Not an everyday cookie but great for the holidays.

MEG's RATING: D-EE-LICIOUS!


HONEYED ALMOND CHERRY SHORTBREAD


While Heather was busy making thin rectangles, I started to put together the dough for the shortbread.


IINGREDIENTS:  
  • 1 cup dried cherries, chopped
  • 2 tbsp of sherry   (Heather and I used Vanilla)
  • 1 tbsp of orange zest
  • 1/2 cup of honey
  • 2 tbsp of unsalted butter
  • 2 cups lightly toasted sliced almonds
  • 1/2 teaspoon salt
  • 1/2 teaspoon pure vanilla extract
  • 8 oz of unsalted butter, softened
  • 3/4 cup icing sugar
  • 2 1/4 cups of  AP flour
  • 1 1/4 teaspoon salt
INSTRUCTIONS: 
1) Combine the first three ingredients, toss and let stand for 1 hour
2) Make the honeyed almonds : Cook honey and butter in a medium sauce pan on medium heat stirring constantly until fragrant and deep amber about 5 minutes.  Add almonds, salt and vanilla.  Stir to coat completely.  Remove from heat and spread on parchment to cool.  Let cool and coarsely chop. 
3) Make the dough: Beat butter and sugar with a mixer on medium speed until pale and fluffy.  Add cherries and mix until combined.  Add flour and salt and mix until dough just comes together, about 1 minute.  Add almonds and mix until combined. 
4) Turn the dough onto a piece of parchment and form into a 2 1/2 by 16 inch long, pressing edges to shape flat.   Wrap in parchment.   Refrigerate until firm, at least 1 hour or up to 2 days.  (Dough can be frozen for up to 3 months) Cut dough into 1/4 inch thick slices and arrange on parchment lined baking sheet.  Chill again for 1 hour.


This is another great recipe by Martha.   We ended up doubling the cherries without doubling the rest of the batch.  I think that only made these cookies better but you need to love dried cherries.  We both do.  
This recipe is also an easy shortbread to put together for those who may have had trouble in the past with shortbread. 


MEG's RATING: D-EEEE-LICIOUS!!!!


We never made it to the sugar cookies so we both left with dough to make them later.  You will also notice chocolate thumb prints in the picture,  they actually didn't really turn out the way they were supposed.  Another batter that spread and flattened more than planned so we didn't really have a good place to put the filling.   I managed to salvage a few cookies for the picture.   Overall it was a GREAT day.   Lots of great cookies, lots of leanings and we had a blast together. 

Related Posts Plugin for WordPress, Blogger...